
It’s difficult to measure losing your precious of photos due to external hard disk failure. What’s worse, however, is that you have no idea how to resolve the issue because it is somewhat intricate. With iTop Data Recovery, you’ll be able to retrieve your most crucial files back in no time.
Step by Step Guide to Recover Photo and Video with iTop Data Recovery:
Step 1: Download and install the iTop Data Recovery on your PC for free. It supports Windows 11, 11, 8 and Windows 7.
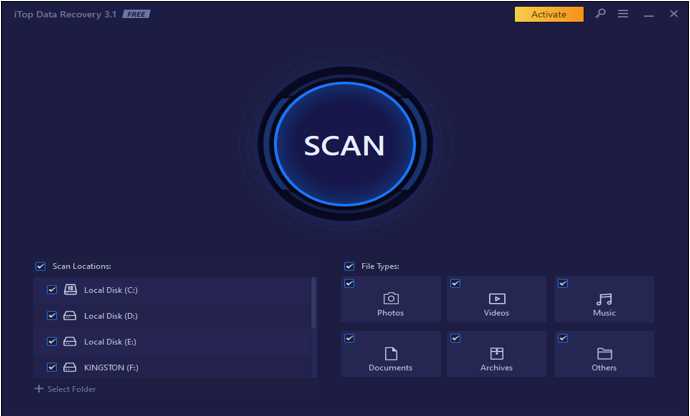
Step 2: Decide on a location and file type in steps 2 & 3. Activate the scanning process by clicking on “Scan”.
Step 3: Check to see if the files can be recovered. Save and recover your files as soon as possible.
When it comes to recovering data from a failed external hard disk, iTop Recovery Software is widely regarded as the most straightforward option. There are many data recovery tools and some of them may be difficult to use if you aren’t familiar with computers. However, iTop Data Recovery is more friendly to use.
Utilize the Windows Recycle Bin:
For external hard drives, the Windows Recycle Bin is a good place to start if you accidentally destroyed your photos and videos. Deleted data is temporarily stored in the Recycle Bin. Using this method, you can locate and recover lost files from external hard drives before deleting them completely. Using the Windows Recycle Bin, you can attempt to retrieve deleted files.
- Using the Windows Recycle Bin is the first step in this process.
- Choose which files or folders you want to restore.
- To recover data from external hard drives, right-click on the files and pick “Restore” from the context menu.
ITop Data Recovery, for example, may be able to aid if your data have been permanently destroyed and the Recycle Bin (Emptied) has been emptied.
The Command Prompt:
Window users can access a command-line interpreter via Command Prompt, which is also known as CMD. Giving your computer text commands can allow you to retrieve data from an external hard drive. When dealing with malware-caused data loss and files that are either invisible or hard to access, this solution comes in handy.
Using Command Prompt, you may restore your files from external hard drives.
- Open the Command Prompt window by pressing the “Win + R” key.
- In the second step, enter “CMD” and press “OK.”
- Next, enter the commands “ATTRIB -h,r,s,s,s,d,x:*.*” and press Enter to complete the process.
Use File History to Restore Deleted Files:
You can utilize Windows’ File History to restore deleted files and recover data from an external hard drive in the event of power outages or system crashes. However, you must first enable the File History option on your computer to create a backup copy of your important files.
Here’s how to use Windows’ File History to get back deleted data.
- There are a number of choices for backing up your data in Settings > Update & Security > Backup. If the option has been enabled, you will be able to see a list of all your backups.
- Find the “Restore files from a current backup” option at the bottom of the page and click on it.
Choosing the files and folders you wish to restore is as simple as selecting them and clicking the green “Restore” button. Alternatively, you can choose “Restore to” from the “gear” menu in the upper right corner to restore your files to a different location.
Conclusion:
Data loss can be upsetting and difficult to deal with. Don’t worry, it’s nothing to be concerned about. In terms of data recovery software, this is the best solution available. So don’t waste any more time, just download and use iTop Data Recovery right now to get all of your files back!